


Wait!
- You have video clips
- You have great background music
- You want to make a movie or an eye-catching Instagram story
- And you cannot wait people watching it.
But do not know what to do next?
We have got you covered! DemoCreator video editor is a solution for your stunning content.
It is very interesting to know that video shooting and selecting a background music is merely 40% of the work. The real deal lies in the editing step. DemoCreator helps you make a mesmerizing sync between music and your videos.
PART 2: Tips for Video Editing
We have got a versatile set of options for you to enhance your content. In this write-up, we basically aim to target few beginner methods to kick start your video editing skills. For now, let us begin with the important basic techniques to make the video breath-taking.
Choose the right software
Your content is valuable, your time is precious. Whether it be:
- Online training course
- Product demonstration
- Step-by-step tutorials
- Gameplays
- Educational and Professional projects
- Or any other video content
DemoCreator is a simple and most handy software for nourishing your video clips and music. With tremendous transition options, text and title feature and pulling up the colors. With DemoCreator you can edit content professionally for your presentations, social media stories, gameplays and Video Demos.
Download DemoCreator by simply going to https://dc.wondershare.com/
Edit for a Story
Remember, video editing is an art of giving your imagination a visual perspective. Whatever you have in mind, your creative intellect, your art of arranging things is what you will be doing with your content. DemoCreator is an easily accessible video editing software.
As you access the software, it gives you both options to,
- Capture
- Or edit the video clips your already have

Capture Videos
Capture option allows you to record your media through camera or webcam of the system you are using. This recorded media is then processed by DemoCreator to edit videos through its Video Editor option.
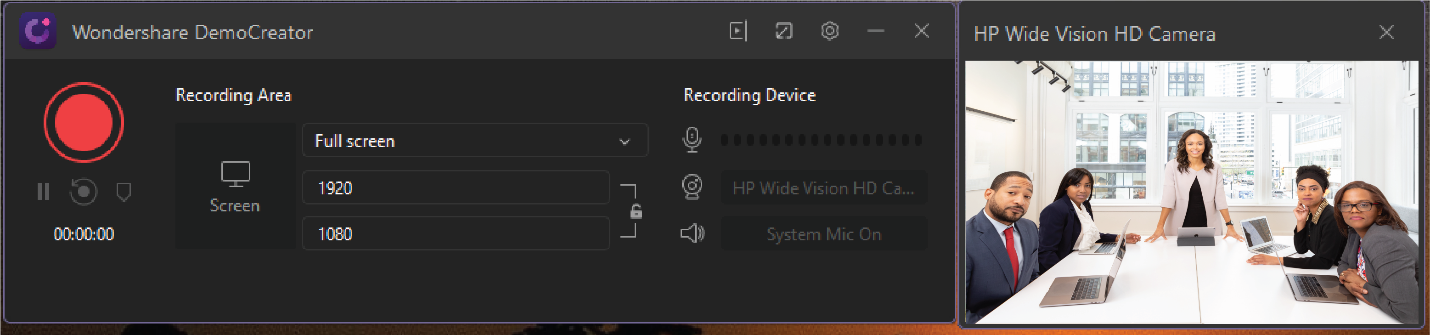
Through Capture option you can record your:
- Screen
- Camera recording
The resolution can be set by altering the width and height of the screen as shown above.
Video Editor
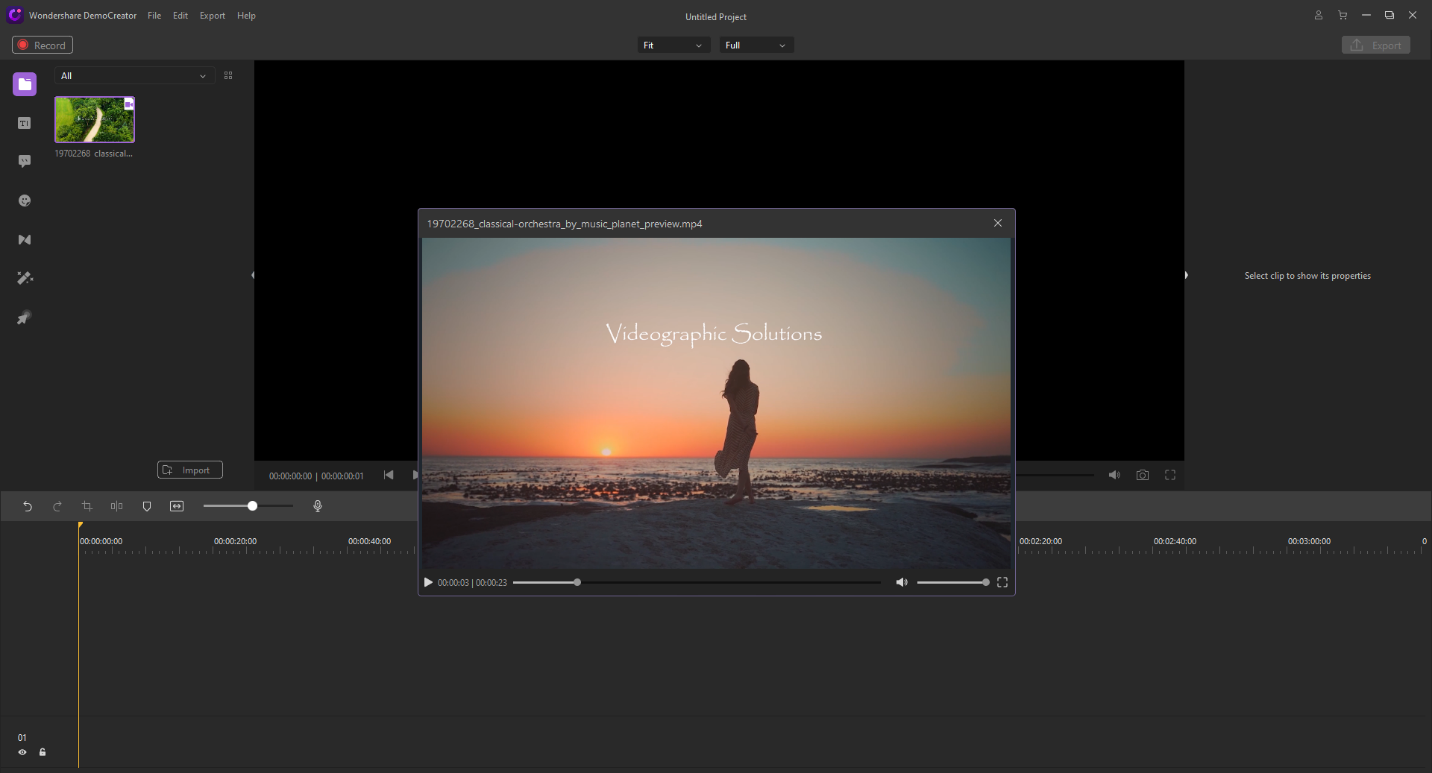
After getting the content, get back to the Video Editing options. On clicking the editing option, an interface appears as:

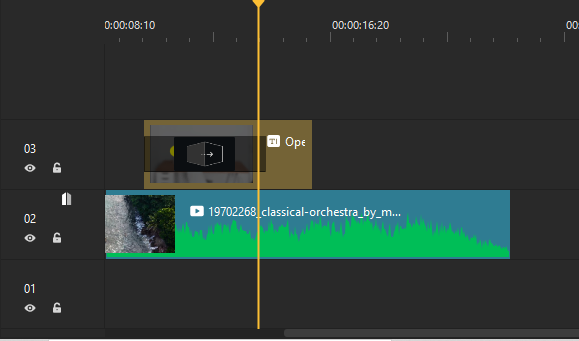
The whole interface can be described in 4 parts.
- The import library
- The story line
- The main video player
- The information bar
The import library helps you import your video and audio content from your system storage by simply navigating to your location.
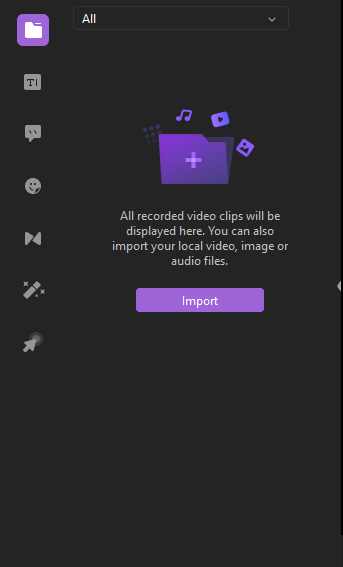
For this click on the IMPORT button, and then your desired file will appear in the same box. As,
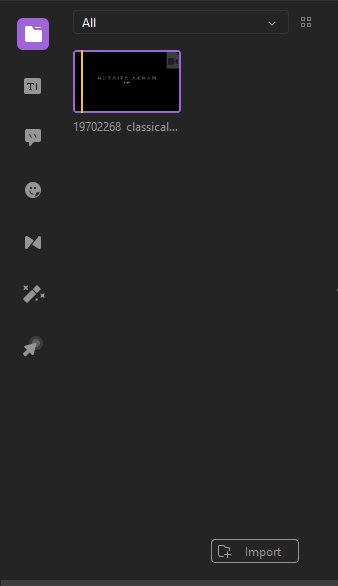
On double-clicking on the imported content, you will have the opportunity to review your video. In this way we can revalidate our imported clips. On doing this, a small new media player window will appear. This will have basic functions of play pause, volume, screen adjustment options for your easy accessibility.
The whole purpose of this is to make your work way simple and understandable. Your aesthetically appealing movies are almost near to a complete edit and re-enhancement
So now you are sure about the video. What next?
Very easy, drag that video to bottom part which shows the story line. On this the video will appear as a bar on a time scale.

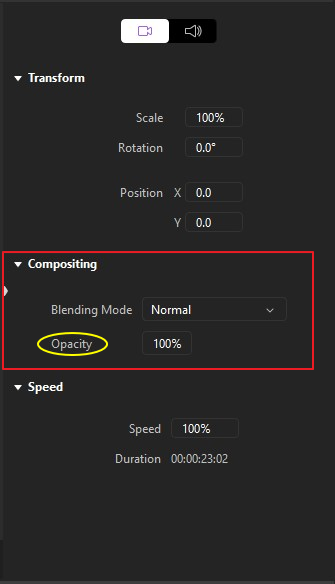
The most-right part is the information section. This shows the composition of video. Including the scale, rotational factor to correct the orientation and the position.
Some of the important techniques that are very precious for a perfect video to be mentioned here is:
Opacity
The opacity can be changed varying from 0 to 100%. Youcan adjust the visibility of the video with 100 considered to be totally visible and 0 as completely faded. Opacity can be changed from the Compositing section in the information part on the right-hand side.
Speed
Whether you prefer a slow-motion or hyper-lapse. It is all in the speed of playback. Speed can be varied with varying the duration of video changes. More the speed, lesser will be video duration and vice versa.
Cutting and Cropping
We have shot a video. Being a director or a cameraman, you always have that additional footage that you want to get rid of. It might be the part when a director calls CUT!
For this, there is a brief menu bar over the story box. With options Undo, Redo, Crop, Split, Marker and Stretch.
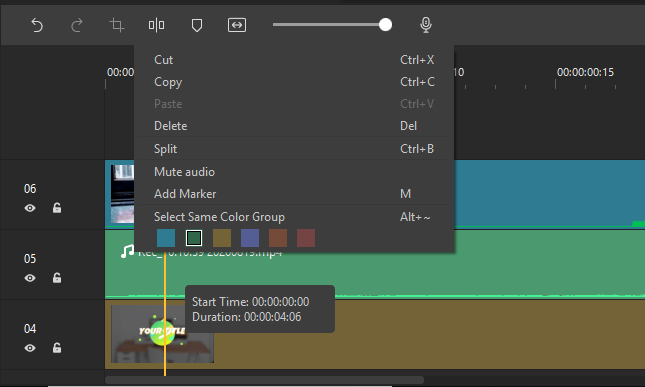
To split a video, simply drag the cursor point where you want to break. After placing that cursor on that time press the SPLIT option as marked above.
And then rid of the part by simply selecting and pressing DELETE.
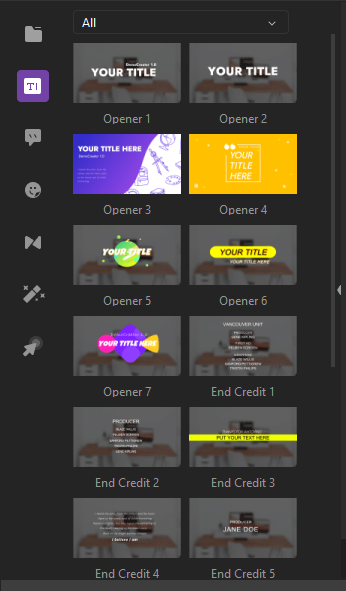
Title or Text
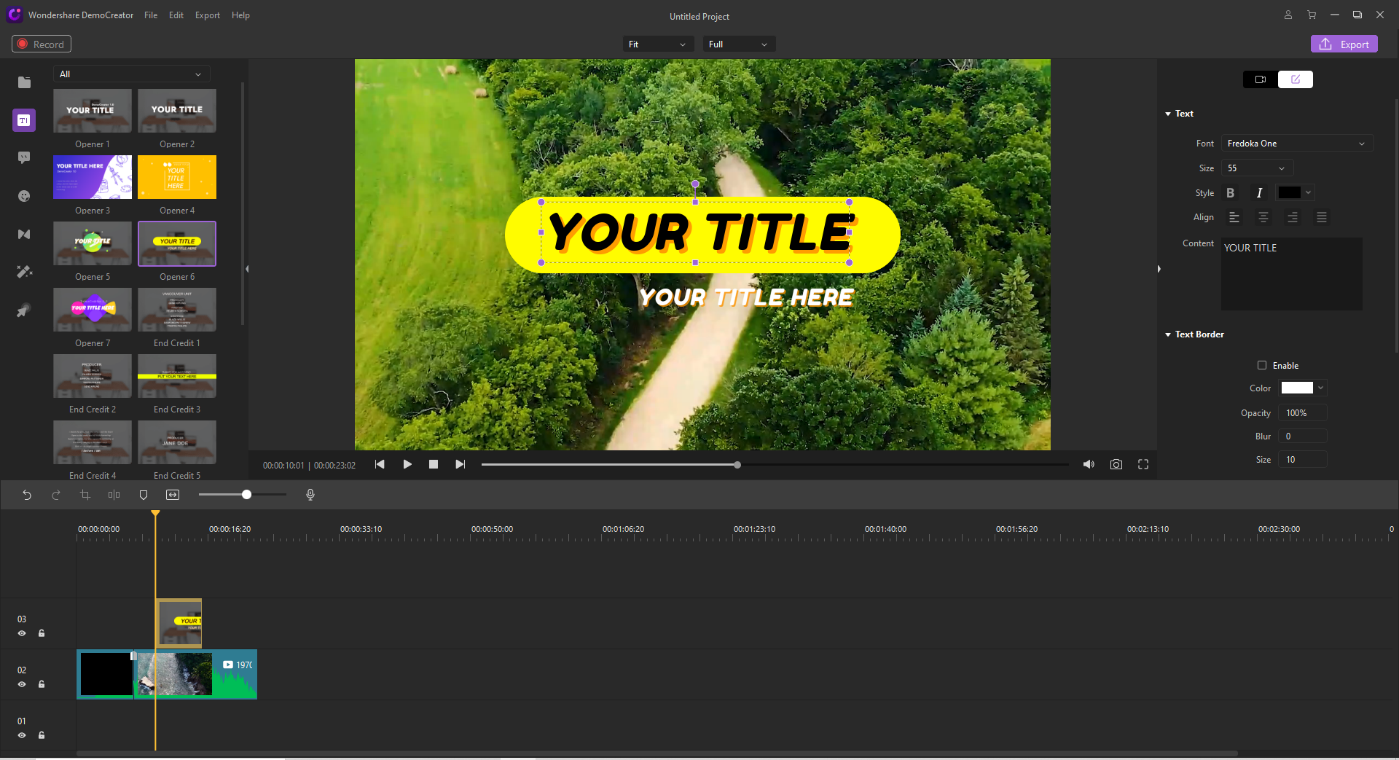
Addition of text and title gives a new dimension to the content. If text is attention drawing than you have made a perfect combination of video and text for your viewers. In order to add text or a title,
- On the top left part, select the Title menu
- This will open many styles of fonts and animation for your text
- Click and drag the most suitable on the story line part
- You can also edit the text by simple clicking it on the Video player section in the middle.
On dragging it down it appears as:
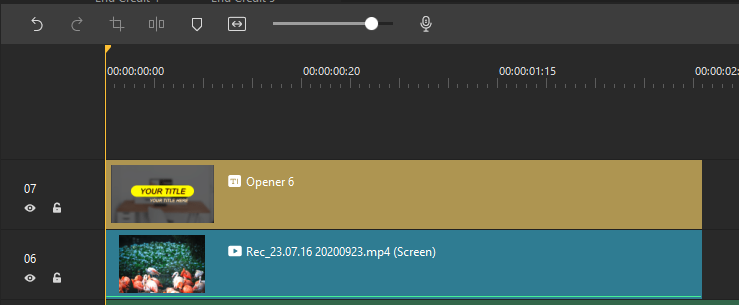
Now in order to add text of your choice simply, double tap on the title and write your favorite text or script.
Annotations and Dialog Boxes
DemoCreator helps in creating all types of videos. It can be your personal Vlog, a presentation video or a lecture. In many informative videos we want an additional explanation for our viewers to precisely deliver a message. For this annotations and dialog boxes are present just beneath the Title box.
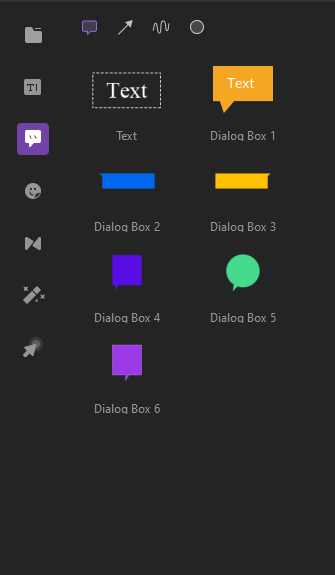
Tap and drag a reasonable annotation for your video content.
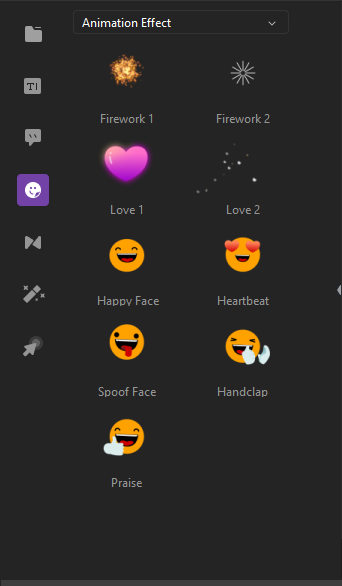
Emoticons
Fun is a part of life. And without showing expressions life is dry and dull. To add one in your video, DemoCreator have it right below the annotations on the left-hand side.
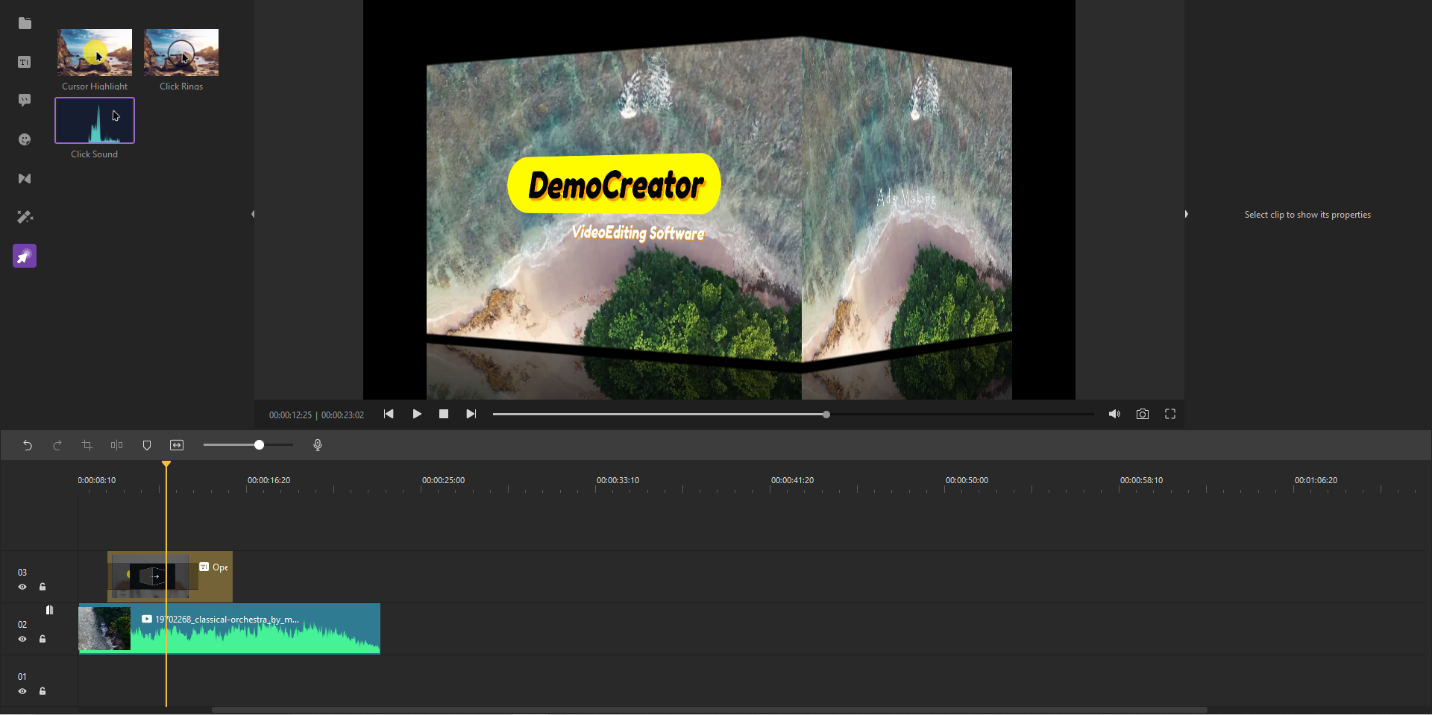
Transitions
The transition has a very important role in a video editing. A smoother transition is a sign of an amazing video. Remember our goal is to viewer attention.
For this we must consider his comfort. DemoCreator helps choose between enormous variety of transitions with 3-D effects and smooth animation. No one can leave without praising your content.
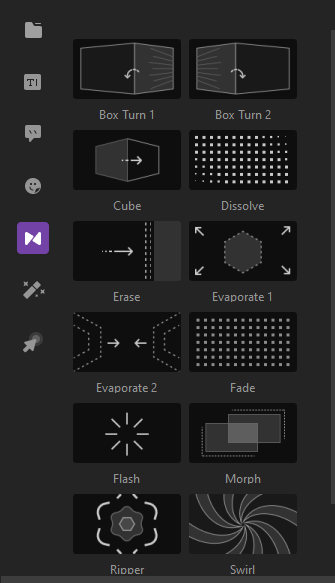
In order to apply the transition, click and drag one on the start or end of a video where you desire it to be.
The sample animation giving a 3-D cubical looks magical.
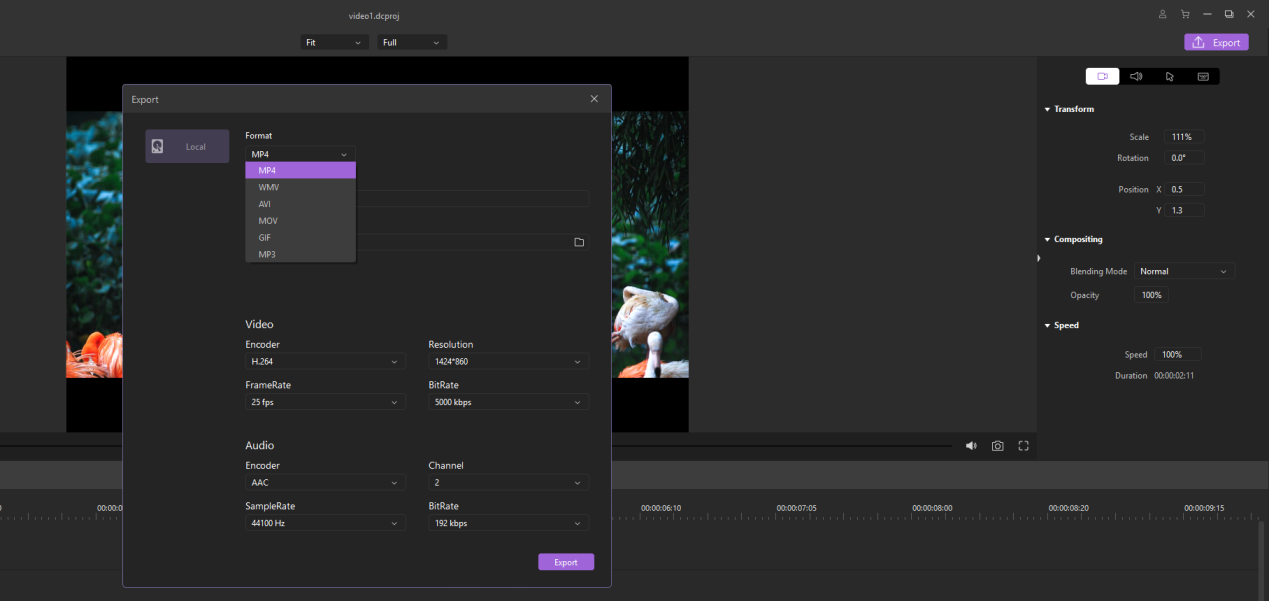
Export
Now as we are done with the enhancement of our movie. And cannot wait of uploading on a social media. We will export the video as a video file. DemoCreator gives a huge variety of options such as MP4, WMV, AVI, MOV, GIF, MP3.
The most reasonable selection is to export in the maximum video quality to let the viewer clearly understand the amount of efforts you have poured in to make up an aesthetically pleasing video and cinematography.
The export button appears on the top right corner of the interface.